
If you’re a homeowner in Florida, you might assume window installation is straightforward—secure the window, and you’re done. However, improper installation is a major cause of water damage, mold, and even structural issues in homes, especially in Florida’s hurricane-prone climate.
Unfortunately, I’ve come across too many homes where windows were installed improperly, resulting in expensive repairs down the road. While fasteners often get the most attention during inspections, the real issue lies in the flashing and waterproofing around the window—an area that is frequently overlooked.
Let’s break down what goes into a properly installed window, why flashing is so important, and how to ensure your home is protected from wind-driven rain and hurricane-force winds.
Hurricane-Rated Windows: Fasteners and Florida Building Code Requirements
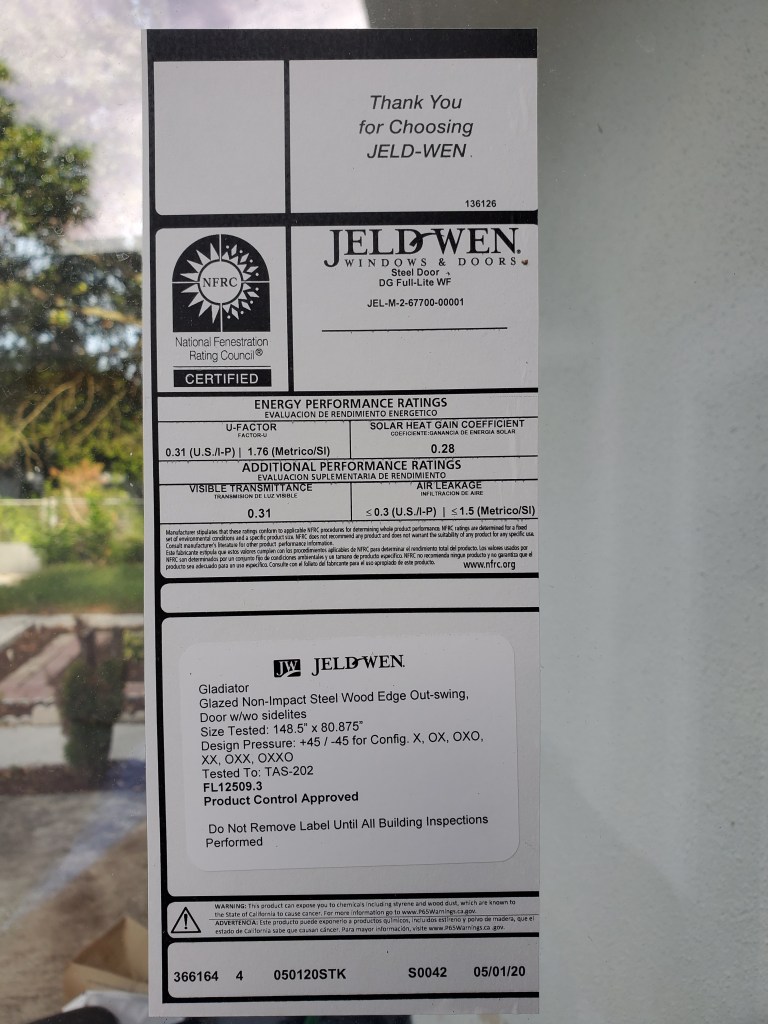
Hurricane-rated impact windows are essential for homes in Florida. To meet state building codes, windows must pass rigorous wind and impact testing and receive Florida Product Approval (FPA). These windows are tested for high winds, flying debris, and pressure changes to help protect your home during a hurricane.
Each approved window comes with installation instructions specifying the type and placement of fasteners (screws or bolts) to secure it to the structure. These instructions are included in the permit box on-site and reviewed by the building inspector during installation.
However, while fasteners get a lot of attention, the real issue is waterproofing. Without proper flashing and sealing, even the strongest impact windows won’t prevent leaks, mold, or long-term damage to your walls.

Flashing and Sealing: The Key to Preventing Water Damage
Flashing is a crucial component of window installation, directing water away from your home’s walls. A common mistake is relying solely on caulking, which is not a substitute for flashing.
Traditionally, metal flashing was used to create a drip edge that forces water away from the wall. Today, plastic flashing is also an option, offering flexibility while still effectively waterproofing the window opening.
When flashing is overlooked or installed incorrectly, Florida’s heavy rains can penetrate the window frame, leading to rot, mold, and interior wall damage. That’s why following proper waterproofing techniques is just as important as securing the window itself.
AAMA Installation Standards: What Most Contractors Overlook
The Florida Building Code, Residential (2023), mandates that window installation follow the manufacturer’s guidelines. But what if those instructions are unclear? The FBC advises starting with the manufacturer’s instructions, then consulting the design professional’s details. If there’s still uncertainty, the code directs you to the American Architectural Manufacturers Association (AAMA) installation standards for further guidance.
AAMA standards provide detailed guidance on flashing and waterproofing for different types of walls, but many window installers don’t even know these standards exist. Since they aren’t always included with the manufacturer’s instructions, it takes extra effort to download and follow them—but they’re essential for preventing leaks and water damage.
If you’re hiring a contractor to install or replace windows, ask whether they follow AAMA guidelines. If they don’t, your home could be at risk of future water damage.
Different Wall Types Require Different Flashing Methods
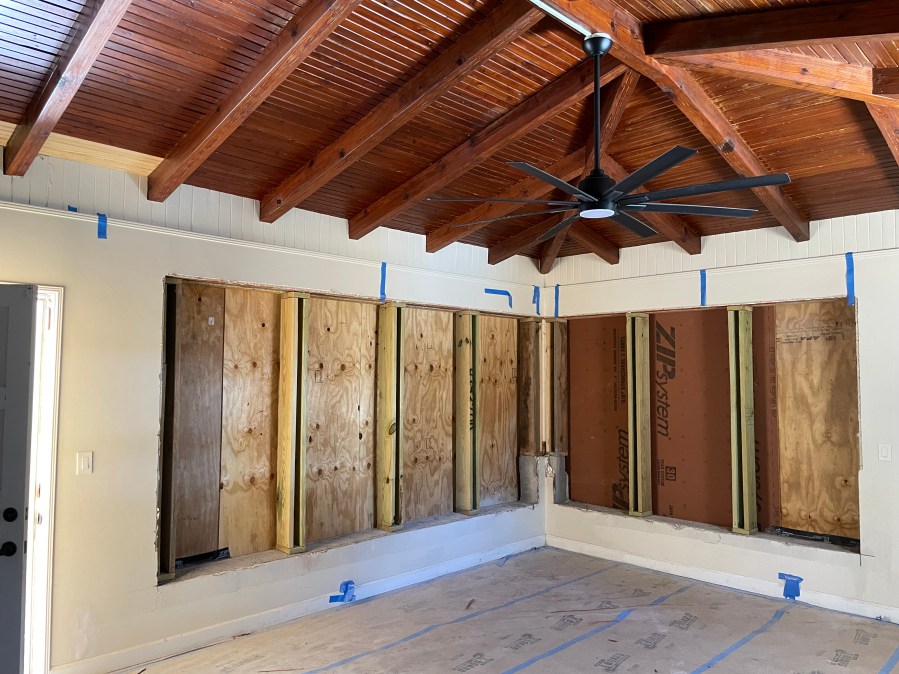
1. Wood Frame Homes (Stucco or Siding)
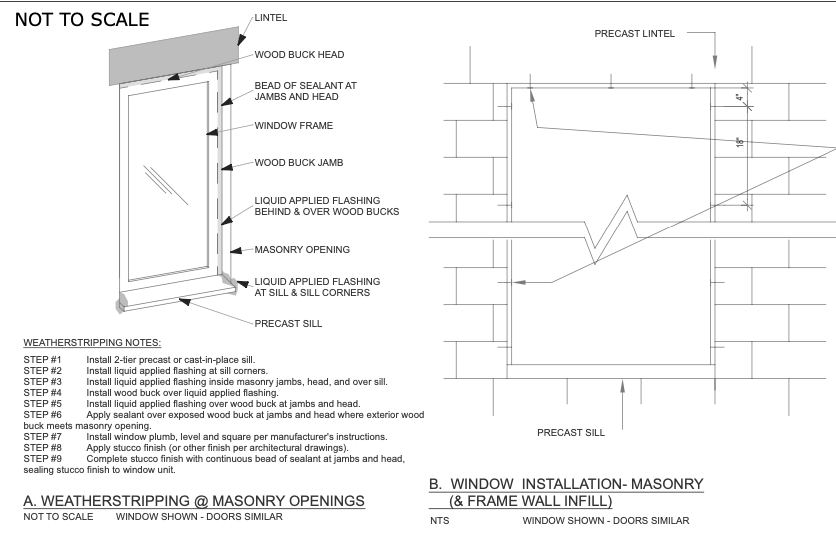
In homes with wood framing, flashing is typically made from metal or plastic sheets, directing water away from the window opening. The window sill (the part that extends beyond the wall) plays an important role in preventing water from seeping into the structure.
2. CMU Block Homes (Concrete Masonry Unit)
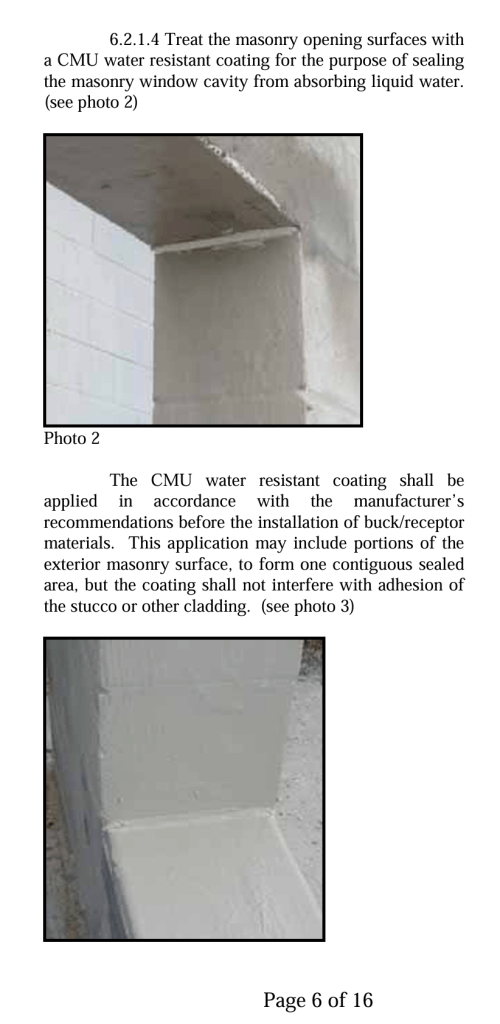
For homes built with CMU block walls, installation methods are different. Traditional flashing doesn’t work as well, so liquid-applied flashing is used instead. This liquid waterproofing is painted onto the block around the window opening, creating a seamless waterproof barrier.
Before installing the window, a wooden buck (like a 2×4) is placed inside the opening to provide a mounting surface. This buck also needs to be flashed properly to ensure no gaps allow water intrusion.
The Importance of a Proper Window Sill
One common mistake in Florida stucco homes—whether wood or block—is the lack of a proper window sill. Without a sill, water runs down the wall and can pool at the base of the window, increasing the risk of leaks and structural damage.
In CMU block walls, a well-designed precast concrete sill helps direct water away from the wall, keeping your home dry even during intense rainstorms. If your home doesn’t have sills, consider adding them to improve water drainage.
Protect Your Florida Home: What Homeowners Should Do
Window Installation in Florida: What to Ask Your Contractor
When installing or replacing windows, don’t just assume they’re being installed correctly—ask your contractor detailed questions about how they’re following the proper guidelines. A well-installed window isn’t just about fasteners; it’s about keeping water out and ensuring long-term durability.
Many Florida homes have stucco exteriors, a style influenced by Mediterranean architecture. However, traditional Mediterranean stucco was designed for dry climates with little rainfall—not Florida’s heavy storms. This makes proper flashing and window sills essential to prevent water intrusion and long-term damage.
Make sure your contractor follows these essential standards:
✔ Manufacturer Installation Guidelines – General instructions for proper fit and function.
✔ Florida Product Approval (FPA) Requirements – Specific fastener placement to withstand hurricane-force winds.
✔ Florida Building Code, Residential, & AAMA Standards – Ensuring correct flashing and sealing to prevent water intrusion.
✔ Properly Designed Window Sills – Essential for directing rainwater away from the home and preventing leaks.
Poor installation can lead to hidden water damage, mold growth, and costly repairs. Take the time to verify that your contractor is doing the job right.
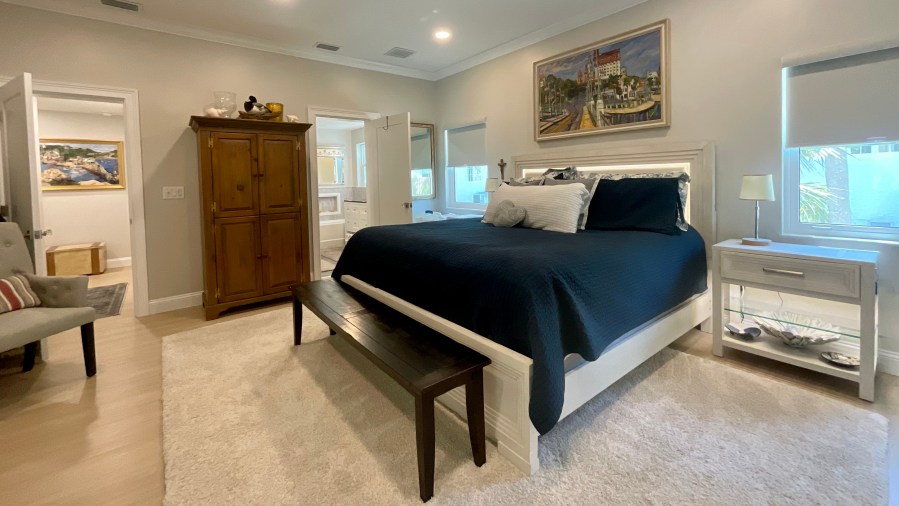
“We applied these window strategies in a full remodel in Belleair Estates, creating a private, comfortable bedroom suite with large windows that maximize natural light and enhance everyday comfort. [See the full Belleair Estates Remodel & Poolside Lanai project here.]”
For expert guidance on designing a storm-resistant Forever Home, visit ForeverHomeArchitect.com.

One thought on “Proper Window Installation for Florida Homes: Preventing Water Damage and Ensuring Hurricane Protection”